QuillSMTP, a versatile WordPress plugin, simplifies SMTP configuration for sending emails from your WordPress website. Seamlessly integrating with trusted email delivery service providers like SocketLabs, QuillSMTP ensures reliable email delivery to your audience.
SocketLabs Mailer Overview #
SocketLabs is a leading email delivery service provider known for its reliable infrastructure and advanced features. With its user-friendly API and robust platform, SocketLabs ensures that your emails are delivered efficiently and securely.
Key Features: #
- High Deliverability: SocketLabs leverages advanced algorithms and infrastructure to optimize email delivery, ensuring high deliverability rates and minimizing the risk of emails being marked as spam or bouncing.
- Scalable Solutions: Whether you’re sending a few emails or managing large-scale campaigns, SocketLabs scales effortlessly to meet your needs without compromising on performance.
- Developer-Friendly API: SocketLabs offers a comprehensive API that allows for seamless integration into your applications and websites, enabling you to automate and customize email sending processes with ease.
Setting Up QuillSMTP with SocketLabs #
Obtain SocketLabs Server Id #
- Log in to your SocketLabs account.
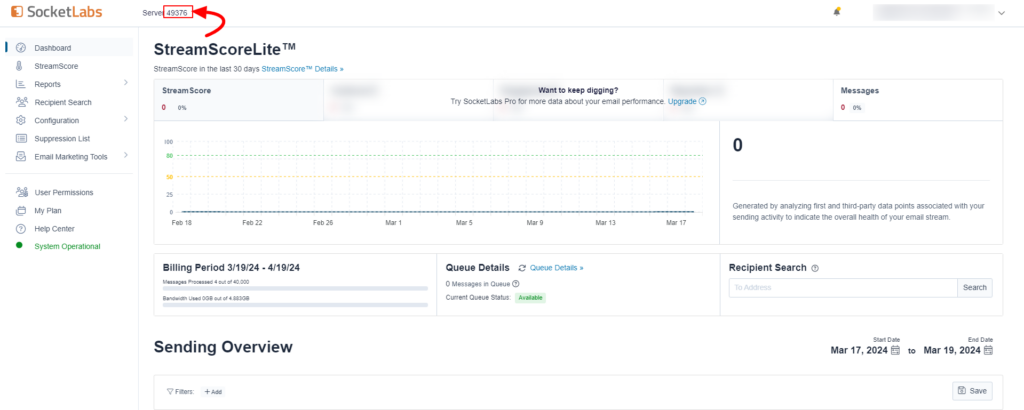
- Navigate to your server.
- Copy the Server Id for later use in configuring QuillSMTP with your WordPress website.
Obtain SocketLabs API Key: #
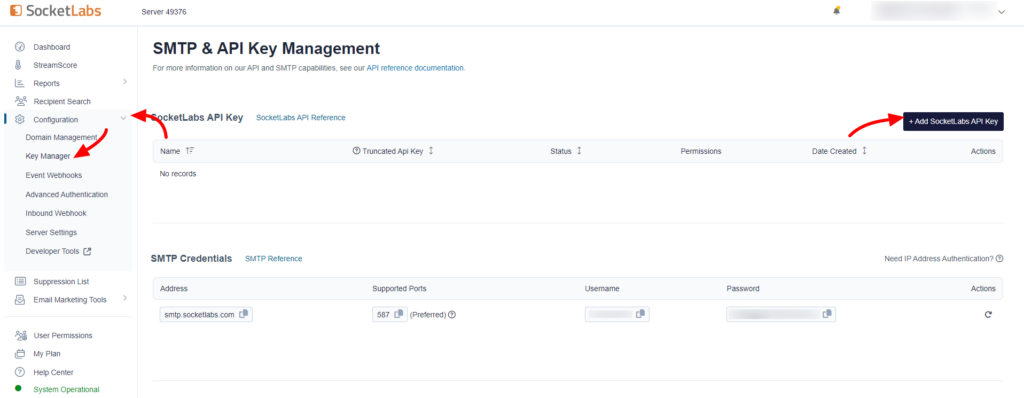
- Navigate to Server Configuration and locate the “Key Manager” section.
- Click the “+ Add SocketLabs API Key” button to create a new API key.
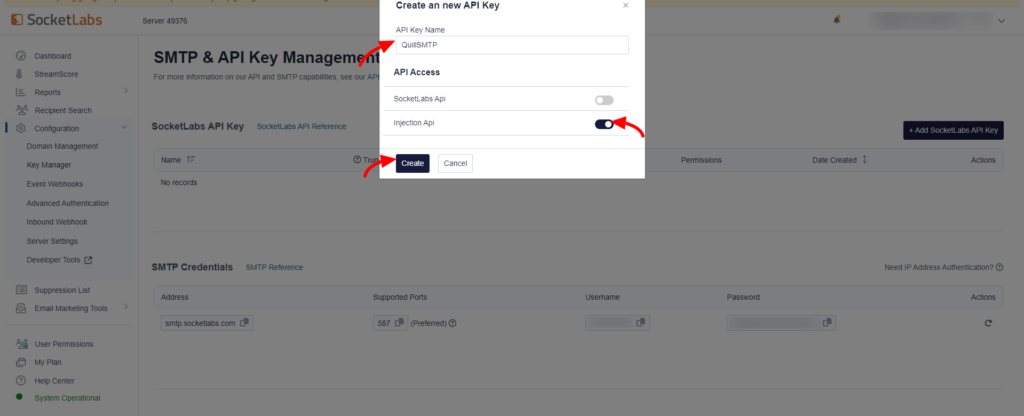
- Provide a descriptive name, such as “Quillsmtp”, for the API key.
- Enable “Injection Api” from the “API Access” options.
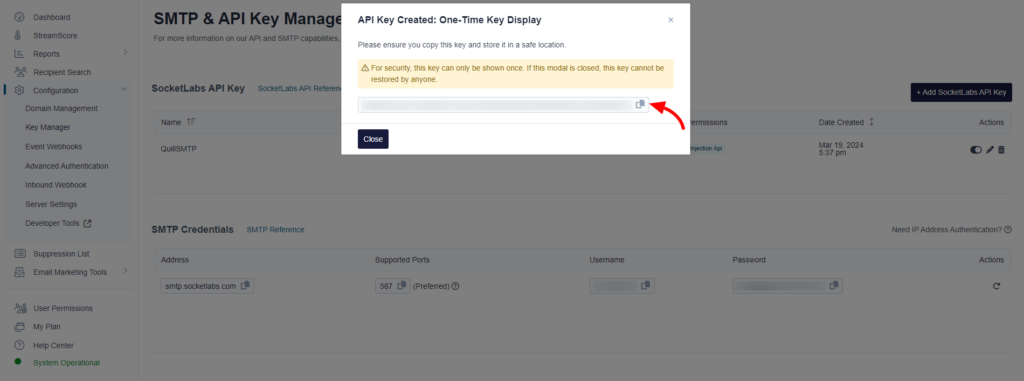
- Click the “Create” button to generate the API key.
- Copy the generated API key for later use in configuring QuillSMTP with your WordPress website.
Setting Up QuillSMTP #
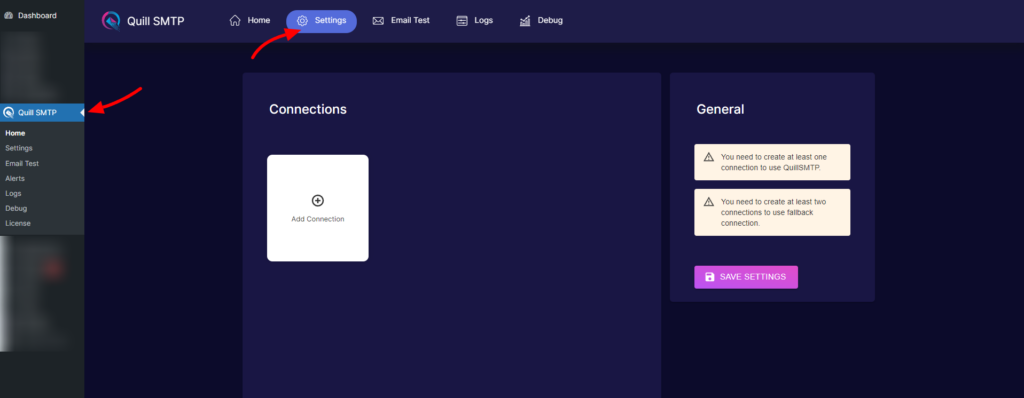
In your WordPress admin dashboard, go to Quill SMTP > Settings Tab.
Setting Up Connection #
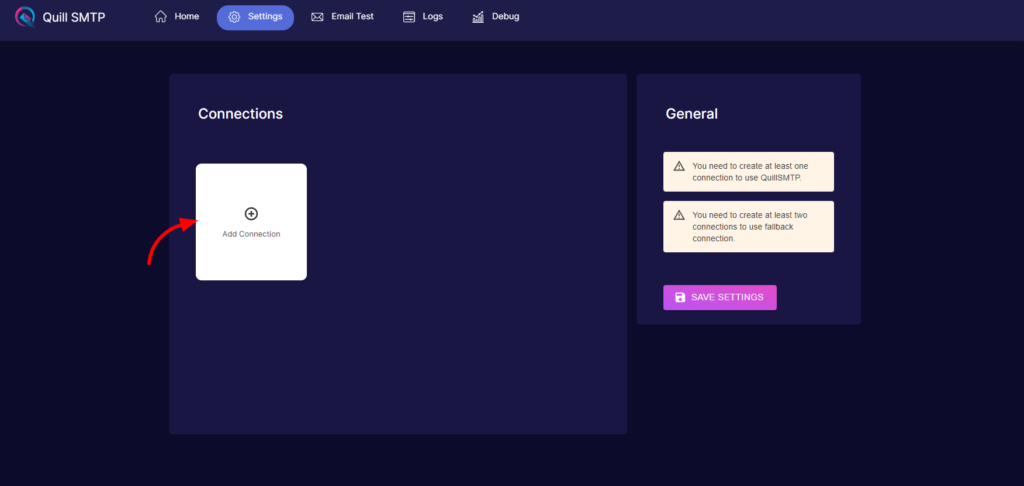
- Initiate the setup process by clicking the “Add Connection”.
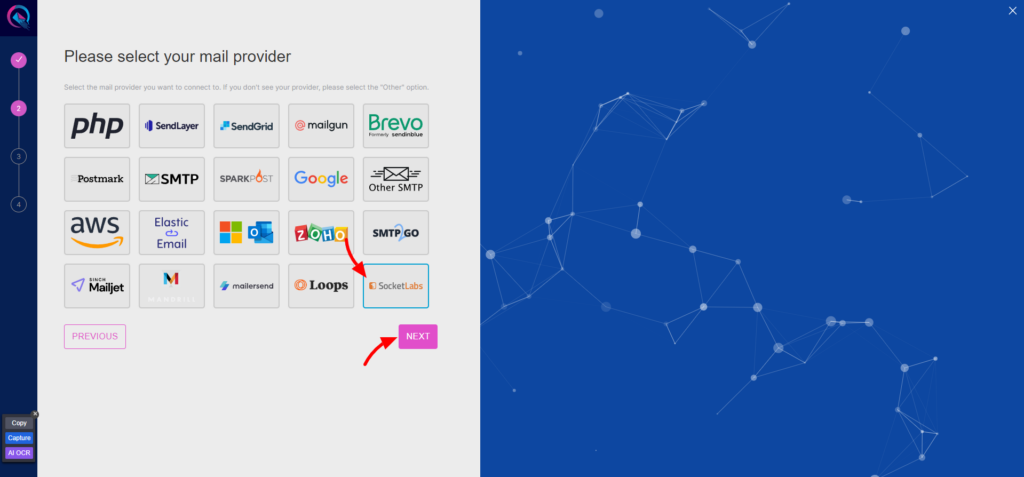
- Name your connection accordingly (e.g., “SocketLabs”).

- Choose SocketLabs from the list of available mailers.
- Then click the “Next” button.
- Provide a descriptive account name (e.g., “My SocketLabs Account”).
- Paste the previously copied API key into the “API Key” field.
- Paste the previously copied Server Id into the “Server ID” field.
- Click the “Add” button.
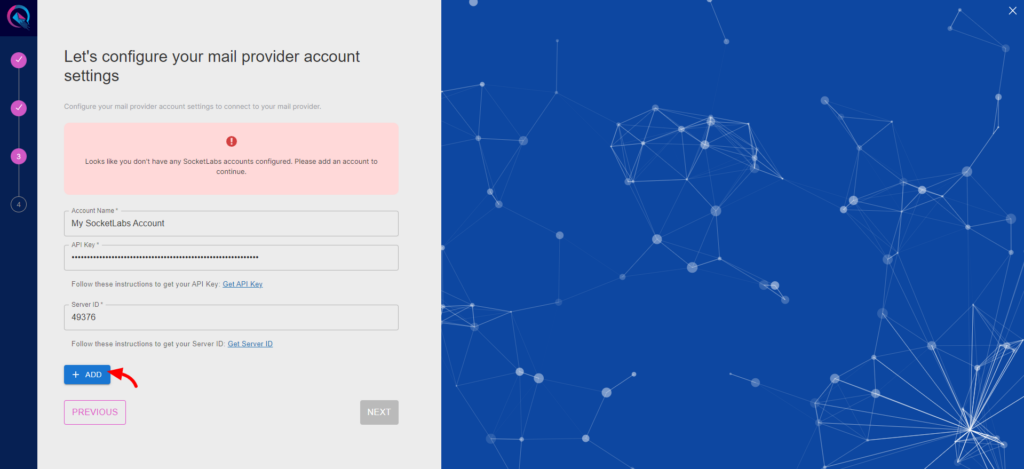
- Click to the “Next” button to complete you connection setup.

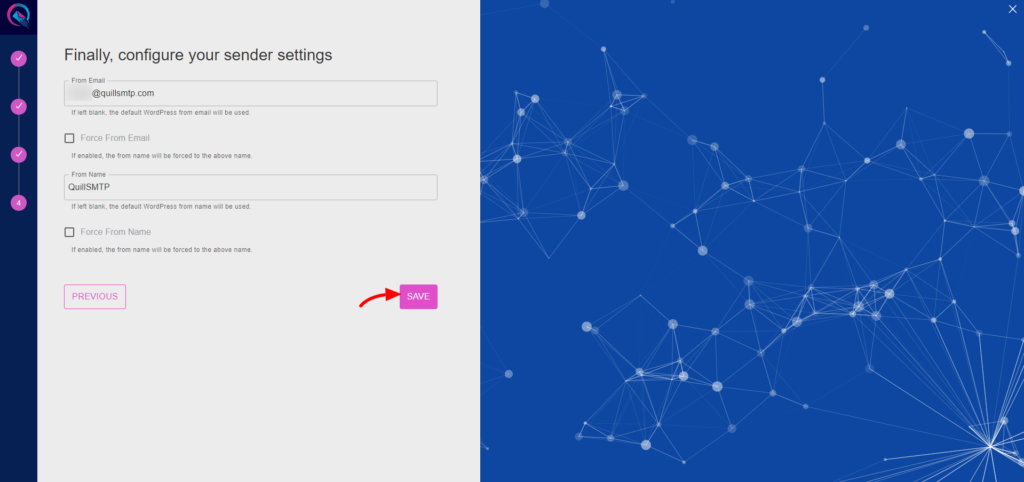
- Input your email address in the designated “From email” field.
- Optionally, toggle the “Force From Email” option if you wish to enforce this email address for all outgoing emails.
- Specify your sender’s name in the provided “From name” field.
- Optionally, toggle the “Force From Name” option to ensure consistent usage of this sender name across all emails.
- Then Click the “Save” button.
