QuillSMTP, a versatile WordPress plugin, simplifies SMTP configuration for sending emails from your WordPress website. Seamlessly integrating with trusted email delivery service providers like Outlook, QuillSMTP ensures reliable email delivery to your audience.
Outlook Mailer Overview #
Outlook is a reputable email delivery service provider designed to enhance email communication for businesses and developers. With its robust infrastructure and developer-friendly API, Outlook ensures secure and efficient email delivery to recipients’ inboxes.
Key Features: #
- Optimized Email Delivery: Outlook employs advanced algorithms and infrastructure to optimize email delivery, ensuring high deliverability rates and minimizing the risk of emails being marked as spam or bouncing.
- Scalable Solutions: Whether you’re sending a few emails or managing large-scale campaigns, Outlook effortlessly scales to meet your needs, ensuring consistent delivery and performance.
- Developer-Centric API: With its developer-friendly API, Outlook enables seamless integration into your applications and websites, empowering you to automate and customize email sending processes with ease.
- Comprehensive Analytics: Gain valuable insights into your email campaigns with Outlook’s comprehensive analytics suite, providing detailed metrics on opens, clicks, bounces, and more to optimize your email strategies.
Setting Up QuillSMTP #
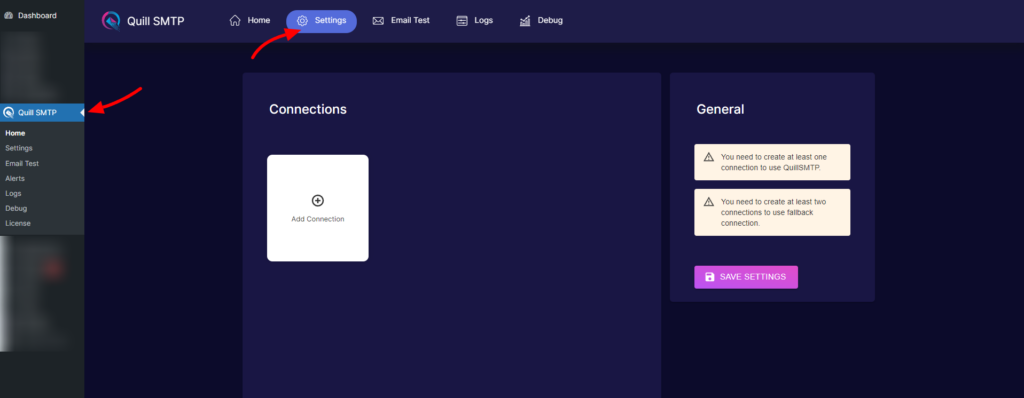
In your WordPress admin dashboard, go to Quill SMTP > Settings Tab.
Setting Up Connection #
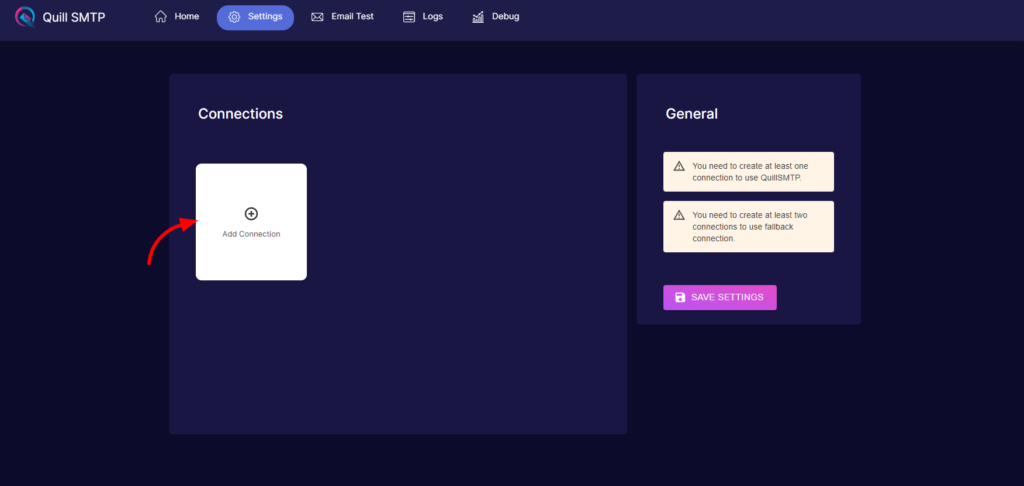
- Initiate the setup process by clicking the “Add Connection”.
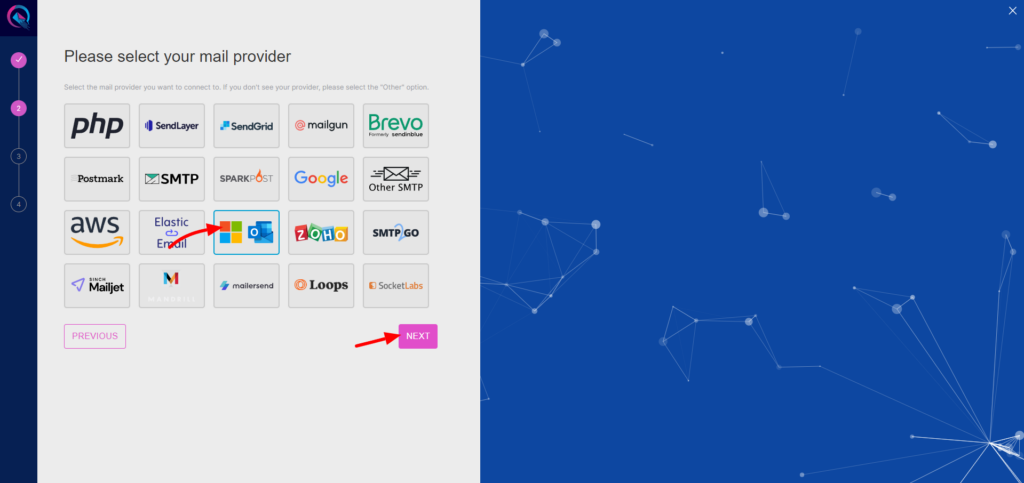
- Name your connection accordingly (e.g., “Outlook”).

- Choose Outlook from the list of available mailers.
- Then click the “Next” button.
- Copy the Redirect URL for later use in configuring Outlook app.
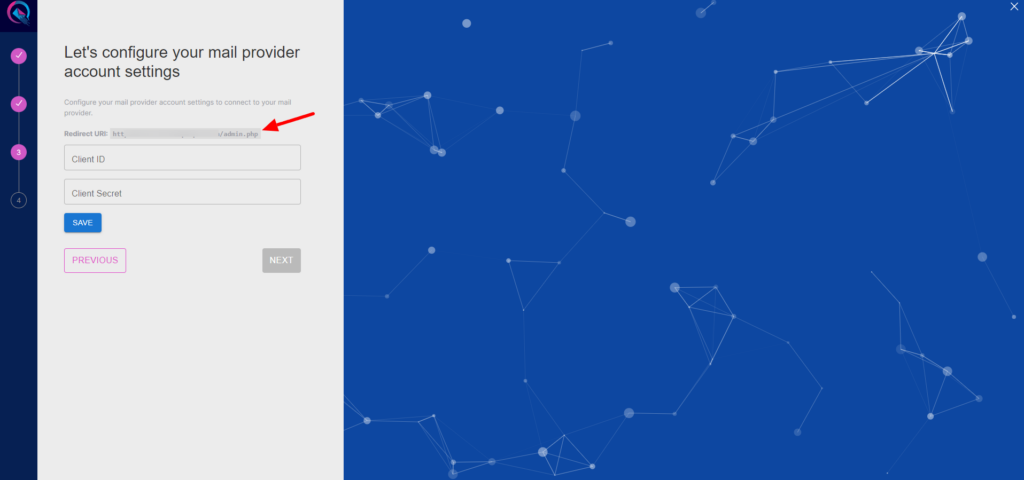
Setting Up Outlook App. #
- Begin by visiting the Outlook Developer Portal and signing up for a developer account.
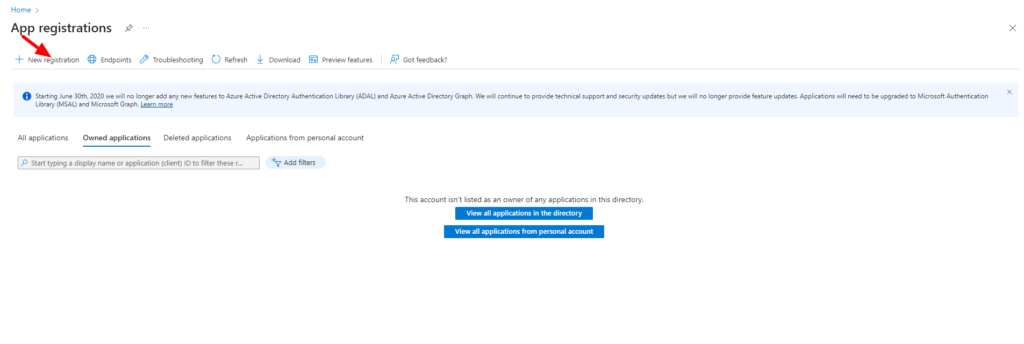
- Type App registrations in the search bar at the top of the page.

- Click on “New registration”.
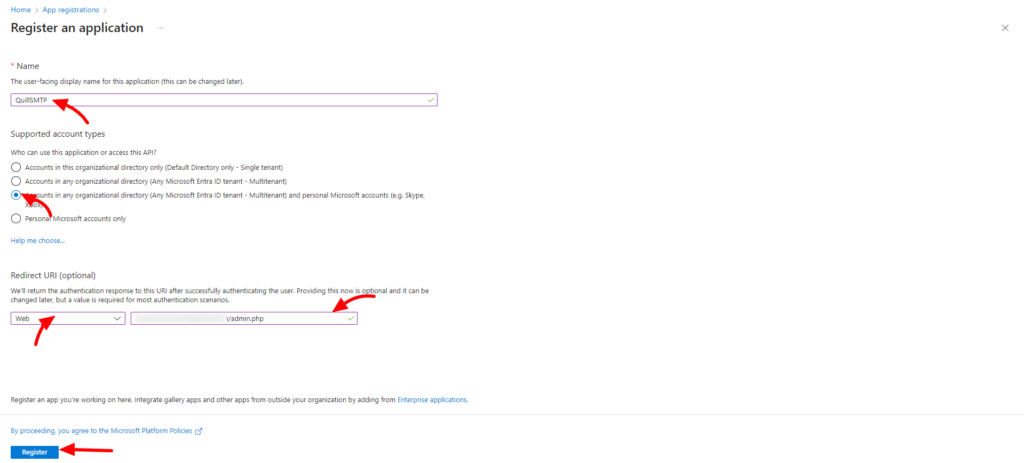
- Specify a distinct Name for your application, such as “QuillSMTP”.
- Select “Accounts in any organizational directory (Any Microsoft Enterprise ID tenant – Multitenant) and personal Microsoft accounts (e.g., Skype, Xbox)” from the “Who can use this application or access this API?” dropdown menu.
- Paste the Redirect URL obtained earlier into the “Redirect URI”.
- Click the “Register” button.
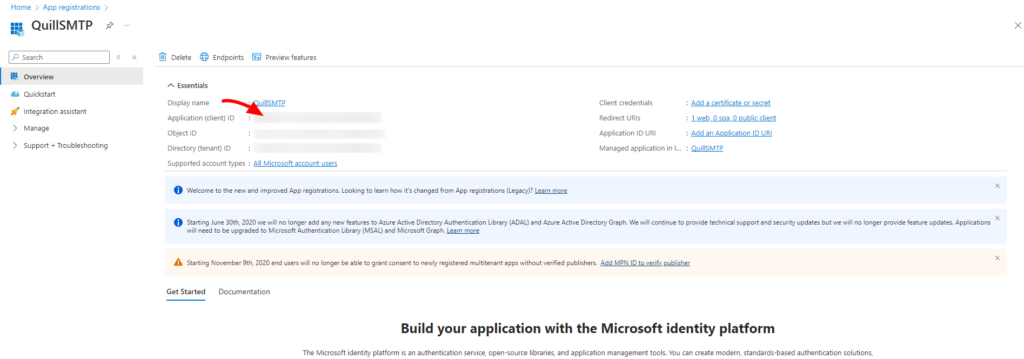
- Copy the generated Client ID for later use in connection.
- Click on Certificates & secrets in the left sidebar.
- Then click the “New Click Secret”.
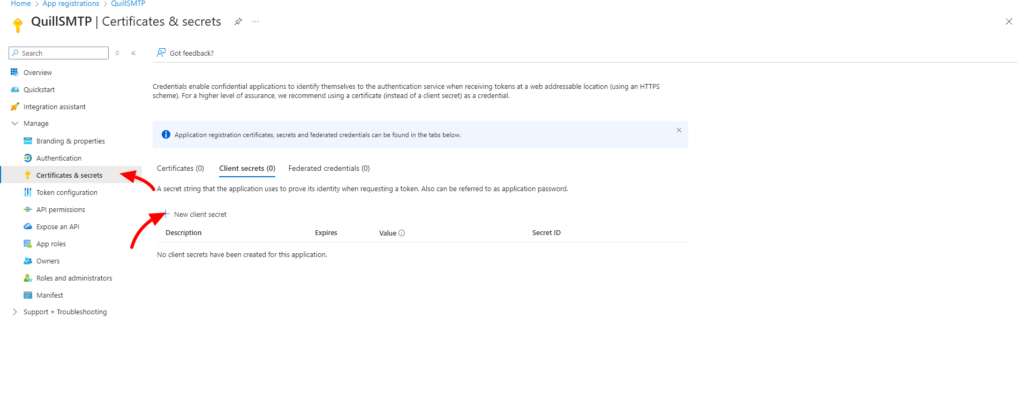
- Specify a distinct Name, such as “QuillSMTP”.
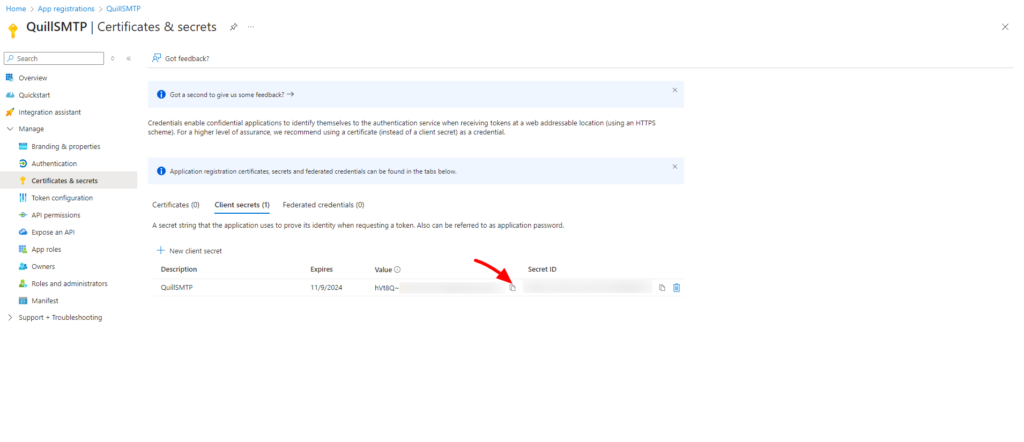
- Click the “Add” button.

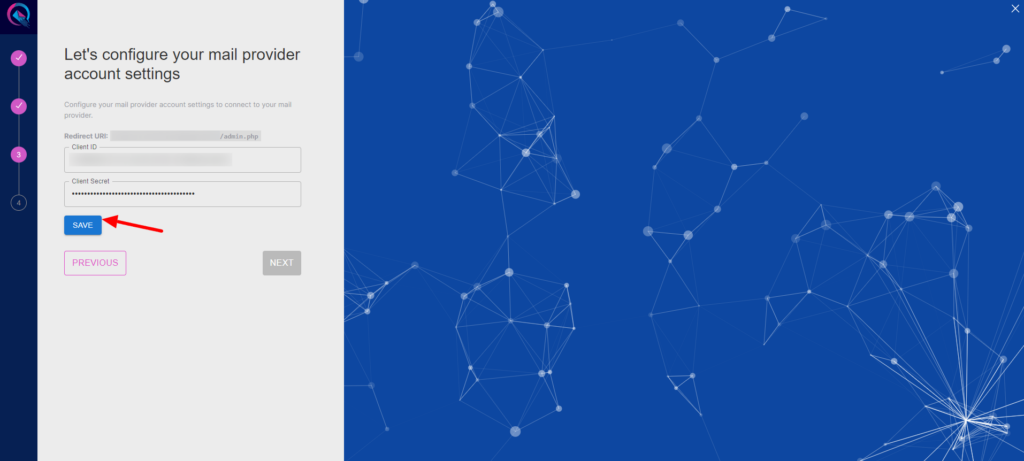
- Copy the generated Client Secret, Client ID and past them into the connection settings.
- Choose your account region then click the “Save” button.
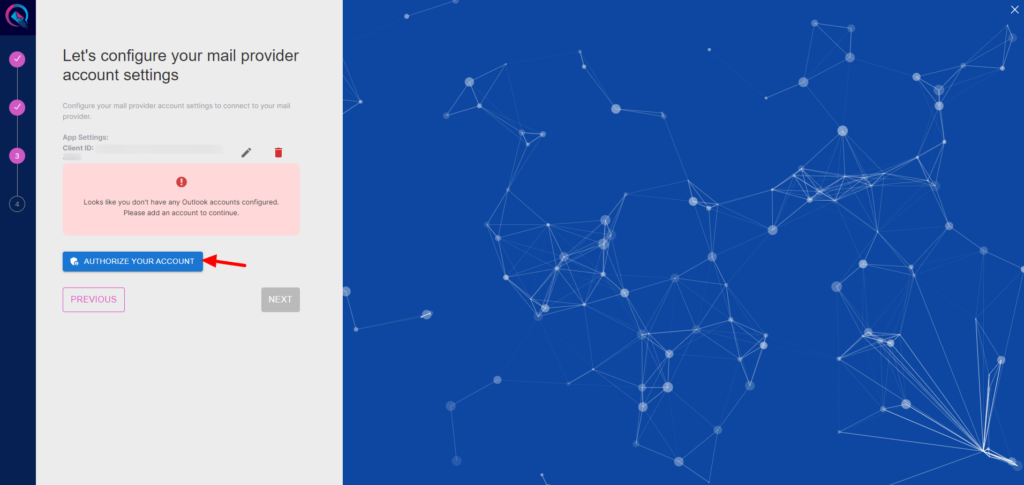
- Click the “Authorize Your Account” button.
- Click “Accept”.

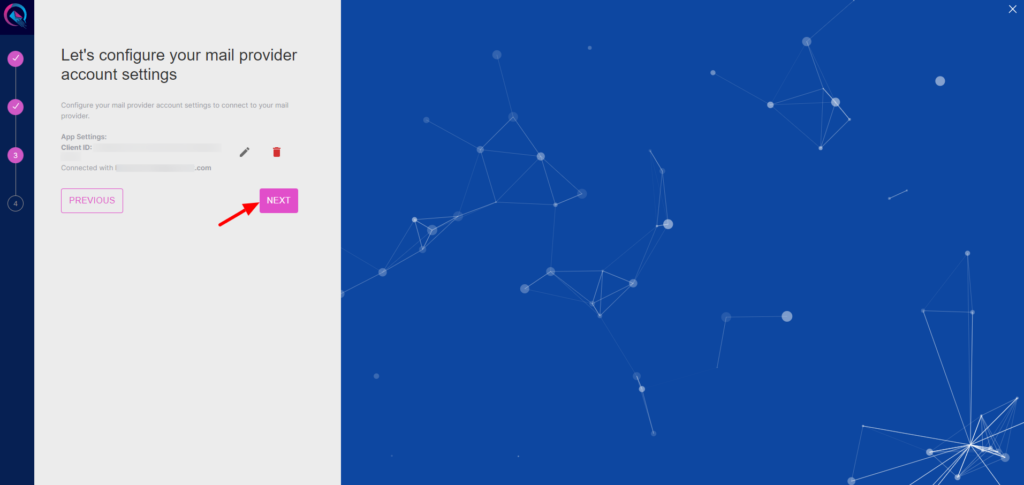
- Click to the “Next” button to complete you connection setup.
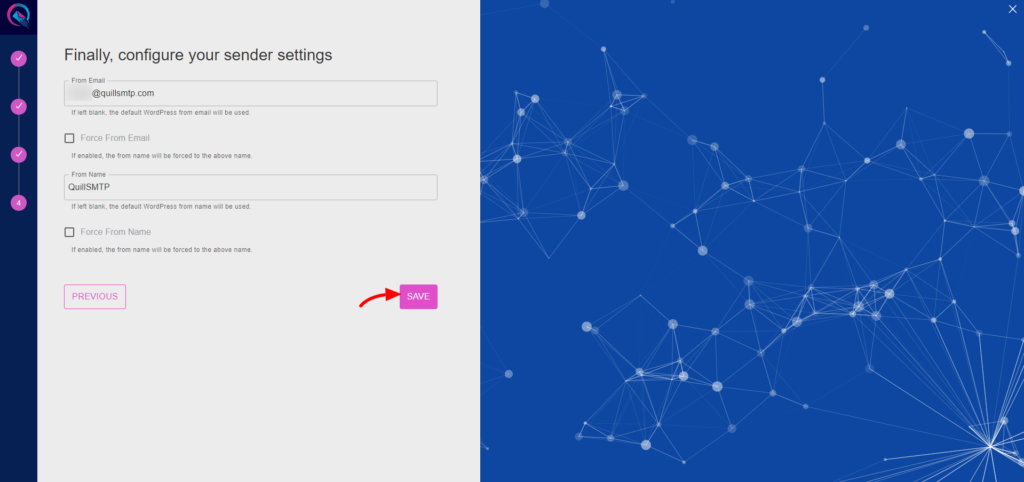
- Input your email address in the designated “From email” field.
- Optionally, toggle the “Force From Email” option if you wish to enforce this email address for all outgoing emails.
- Specify your sender’s name in the provided “From name” field.
- Optionally, toggle the “Force From Name” option to ensure consistent usage of this sender name across all emails.
- Then Click the “Save” button.
