QuillSMTP, a versatile WordPress plugin, simplifies SMTP configuration for sending emails from your WordPress website. Seamlessly integrating with trusted email delivery service providers like Gmail, QuillSMTP ensures reliable email delivery to your audience.
Gmail Mailer Overview #
Gmail, a popular email service provided by Google, offers robust features and reliability. While Gmail primarily serves as an email client, it also provides SMTP functionality that allows users to send emails through their Gmail accounts from external applications.
Key Features: #
- Trusted Email Service: Gmail is a widely recognized and trusted email service provider known for its reliability and security.
- Robust Infrastructure: With Google’s vast infrastructure, Gmail ensures efficient and timely delivery of emails to recipients’ inboxes.
- Integration with QuillSMTP: QuillSMTP seamlessly integrates with Gmail, allowing WordPress users to send emails through their Gmail accounts directly from their websites.
Setting Up QuillSMTP #
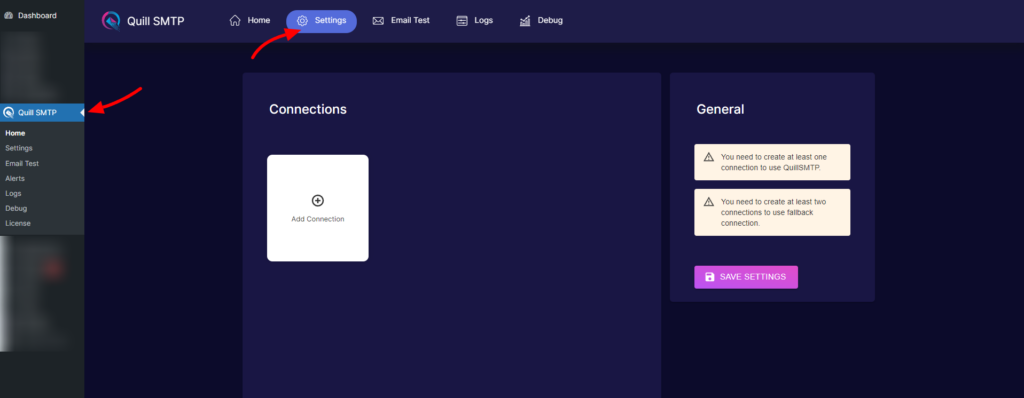
In your WordPress admin dashboard, go to Quill SMTP > Settings Tab.
Setting Up Connection #
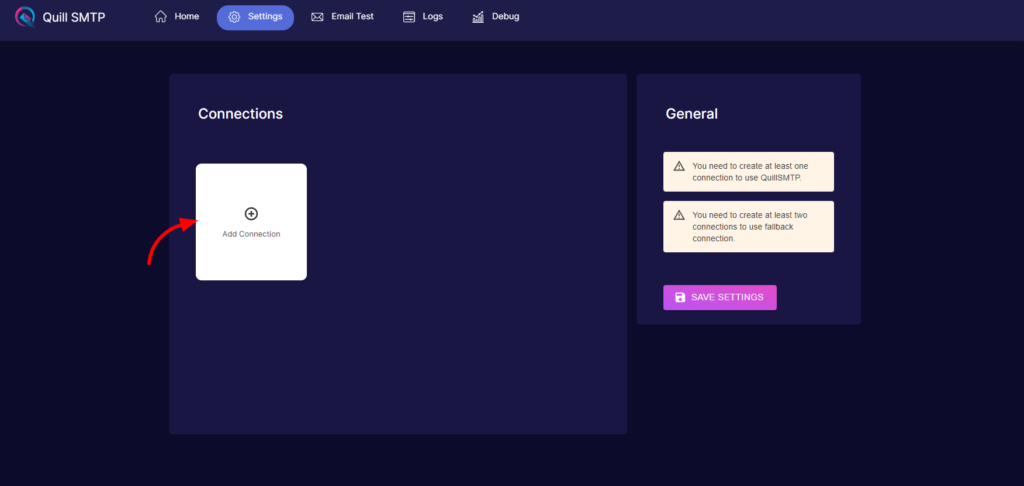
- Initiate the setup process by clicking the “Add Connection”.
- Name your connection accordingly (e.g., “Gmail”).

- Choose Gmail from the list of available mailers.
- Then click the “Next” button.

Copy the Redirect URL for later use in configuring Gmail app.

Setting Up Google App. #
- Go to the Google Cloud Console.
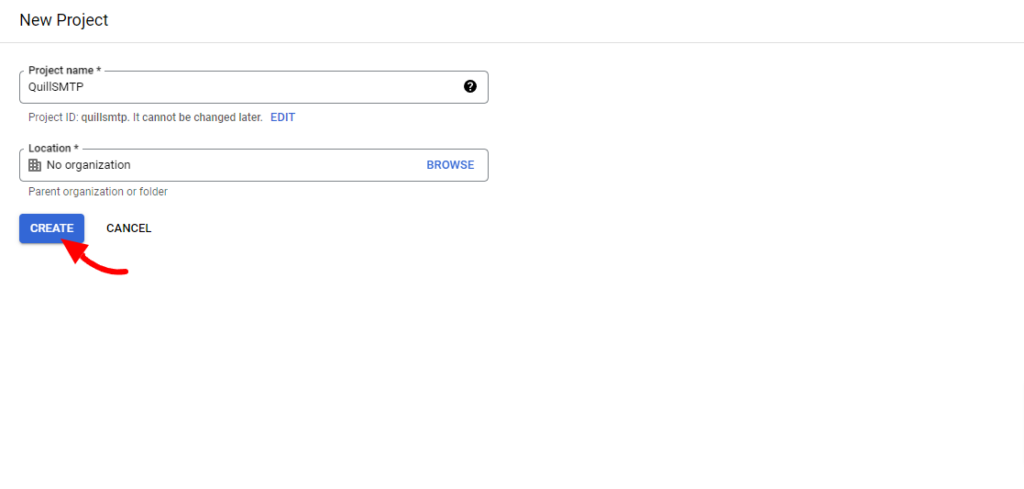
- Create a new project.
- Click on the projects dropdown in the toolbar at the top of your dashboard.
- Click on New Project in the top right corner.


- Specify a distinct Name for your project, such as “QuillSMTP”.
- Navigate to the “APIs & Services” > “Library” section.

- Type Gmail API in the search bar at the top of the page.

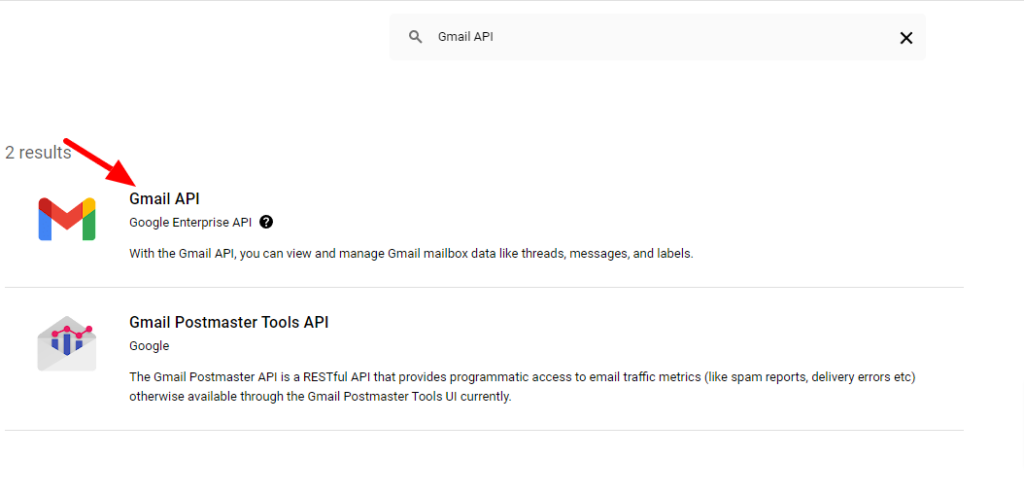
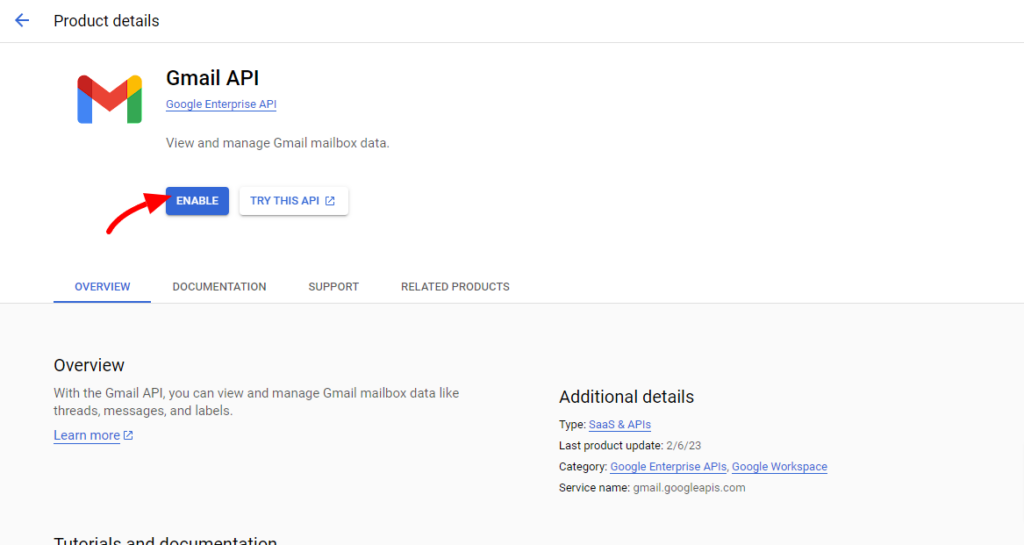
- Click the “Enable” button.
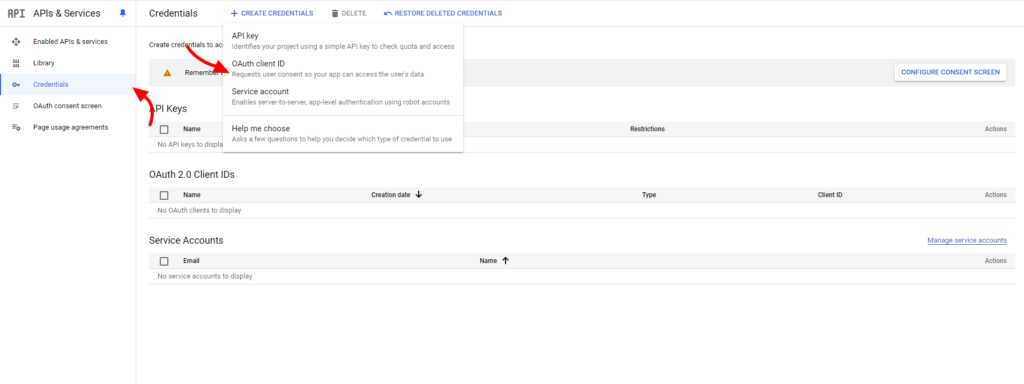
- Click on “Create credentials” and Click “Create credentials”.
- Select “OAuth client ID”.
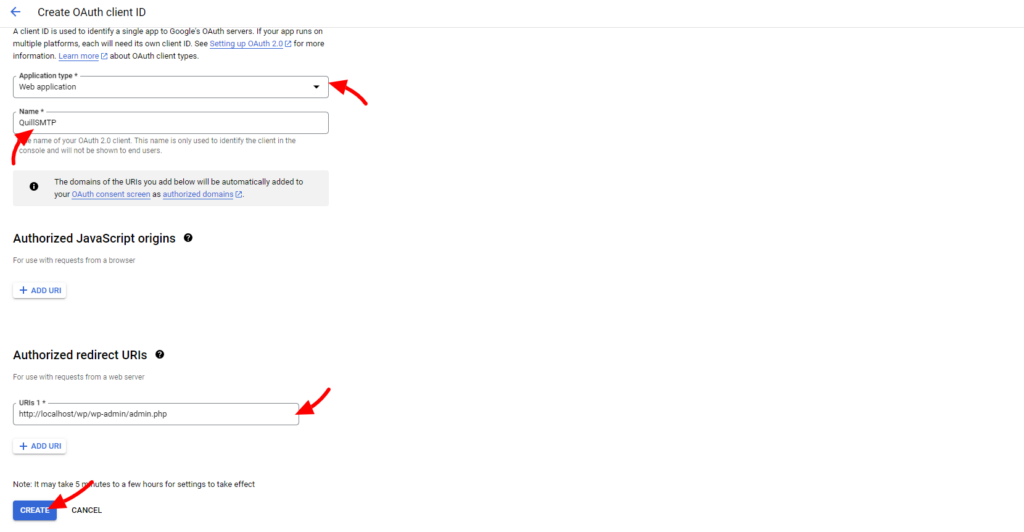
- Choose “Web Application” from Application Type.
- Specify a distinct Name for your application, such as “QuillSMTP”.
- Paste the Redirect URL obtained earlier into the “Authorized redirect URIs”.
- Click the “Create” button.
- Copy the generated Client ID and Client Secret and past them into the connection settings.
- Choose your account region then click the “Save” button.


- Click the “Authorize Your Account” button.

- This will open a login screen for Google. Go ahead and log in to the account you’re setting up SMTP with.
- Click “Continue”.

- Click to the “Next” button to complete you connection setup.

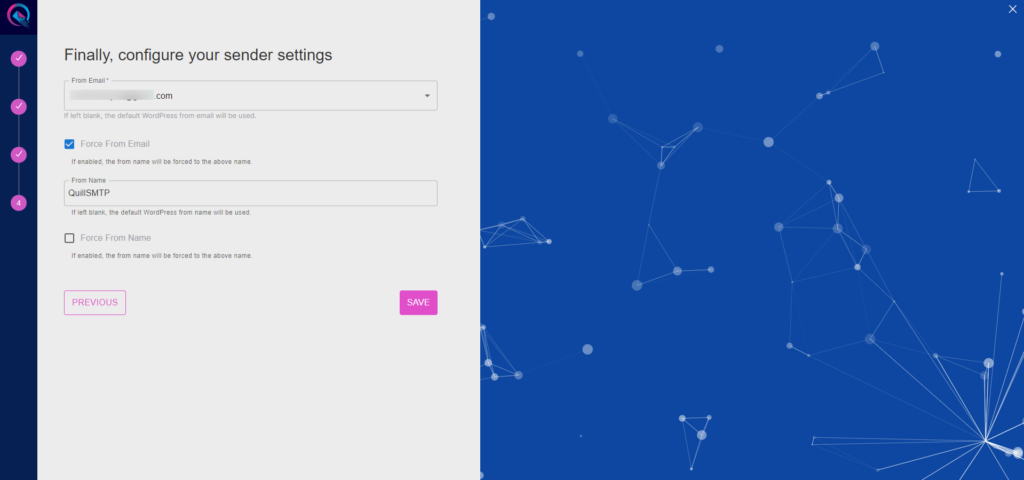
- Choose your email address in the designated “From email” field.
- Optionally, toggle the “Force From Email” option if you wish to enforce this email address for all outgoing emails.
- Specify your sender’s name in the provided “From name” field.
- Optionally, toggle the “Force From Name” option to ensure consistent usage of this sender name across all emails.
- Then Click the “Save” button.
