QuillSMTP, a versatile WordPress plugin, simplifies SMTP configuration for sending emails from your WordPress website. Seamlessly integrating with trusted email delivery service providers like Amazon SES, QuillSMTP ensures reliable email delivery to your audience.
Amazon SES Mailer Overview #
Amazon Simple Email Service (Amazon SES) is a cloud-based email sending service designed to help businesses and developers send marketing, notification, and transactional emails. With its robust infrastructure and developer-friendly API, Amazon SES ensures secure and efficient email delivery to recipients’ inboxes.
Key Features: #
- Reliable Email Delivery: Amazon SES provides a highly reliable email delivery service, ensuring that your emails reach your recipients’ inboxes without delays.
- Scalable Solutions: Whether you’re sending a few emails or managing large-scale email campaigns, Amazon SES can scale effortlessly to meet your needs, ensuring consistent delivery and performance.
- Developer-Friendly API: Amazon SES offers a developer-friendly API that allows for seamless integration into your applications and websites, enabling you to automate and customize email sending processes with ease.
- Regional Availability: Amazon SES is available in multiple regions worldwide, allowing you to choose the region closest to your audience for optimal performance.
Setting Up QuillSMTP with Amazon SES #
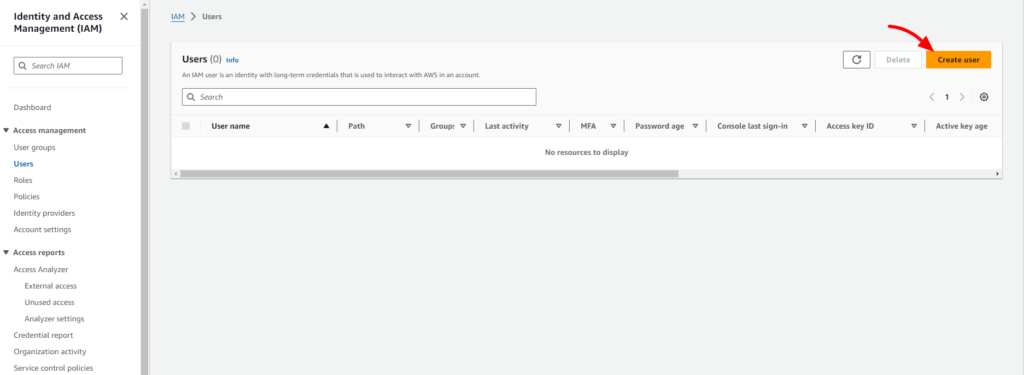
- First, you’ll need to open the Amazon Web Services’ IAM Users page.
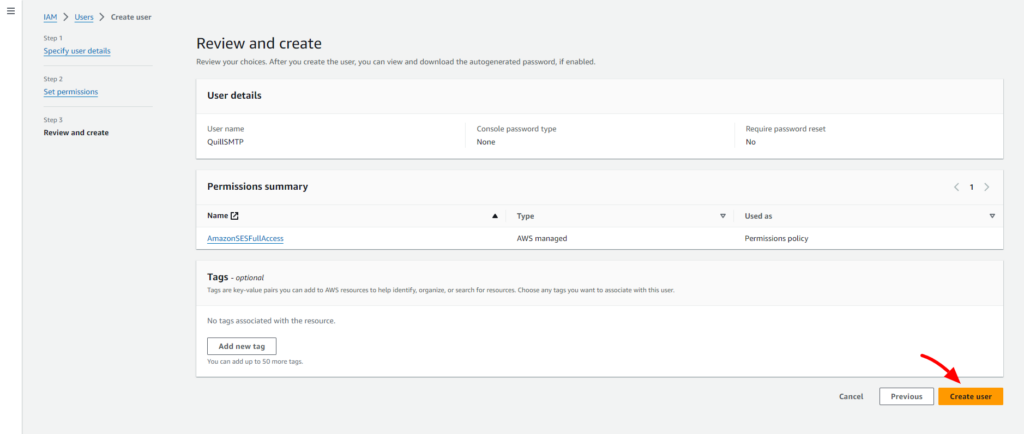
- Click on the “Create User” button.
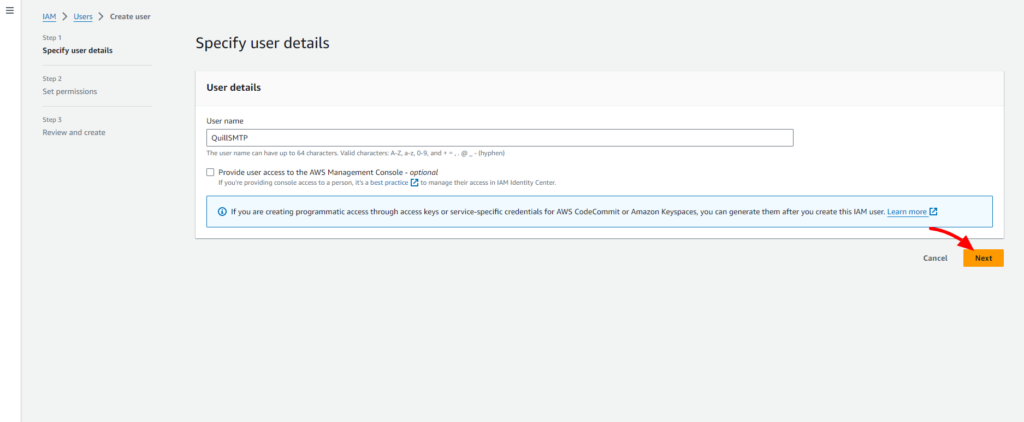
- Provide a descriptive name, such as “QuillSMTP”.
- Then click the “Next” button.
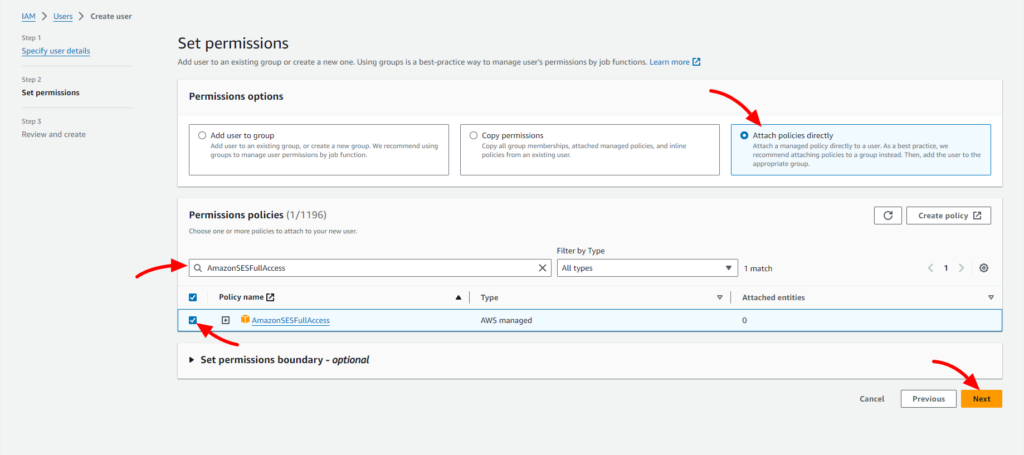
- Choose “Attach policies directly” from the “Permissions options” dropdown menu.
- Search for “AmazonSESFullAccess” in the “Permissions policies” section and select it.
- Proceed by clicking the “Next” button.
- Click the “Create User” button.
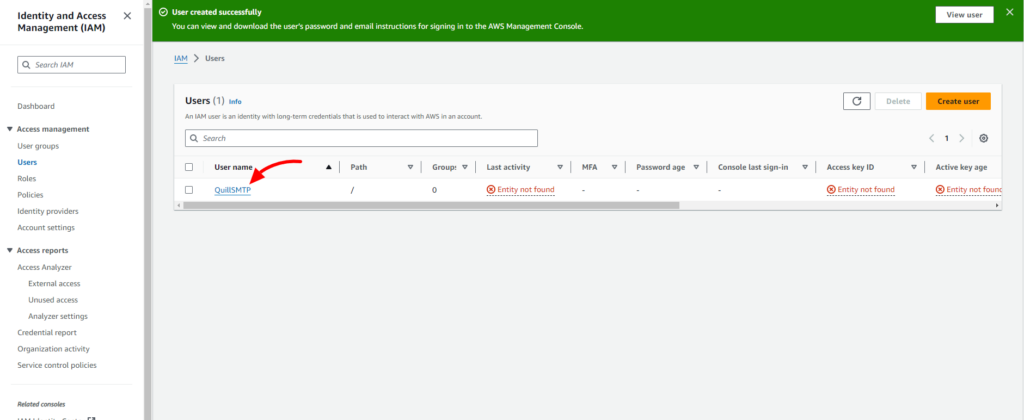
- Locate the IAM user you created from the list of users.
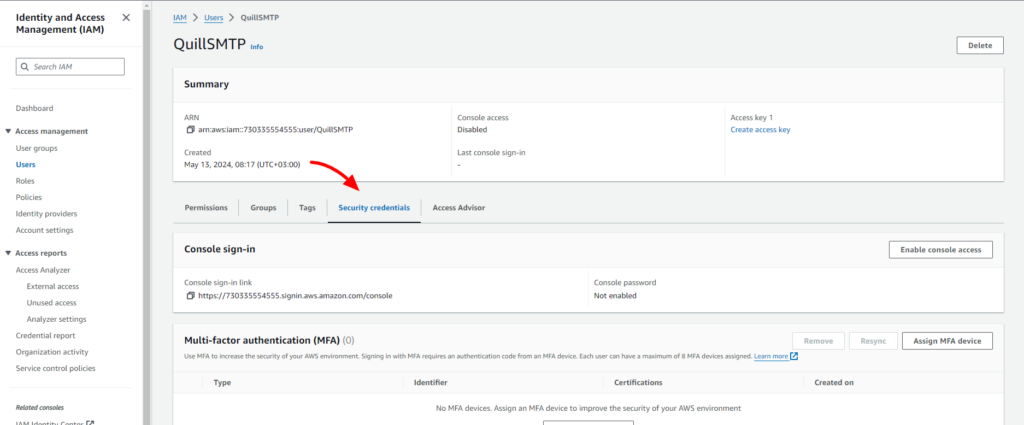
- Click on the name of the IAM user to navigate to their details.
- Access the “Security credentials” section from the dashboard.
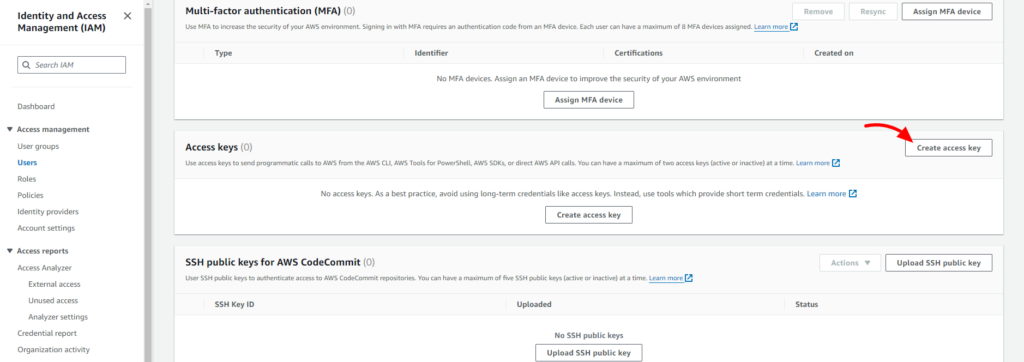
- Scroll down until you find the “Access keys” section.
- Click on the “Create access key” button to generate a new access key.
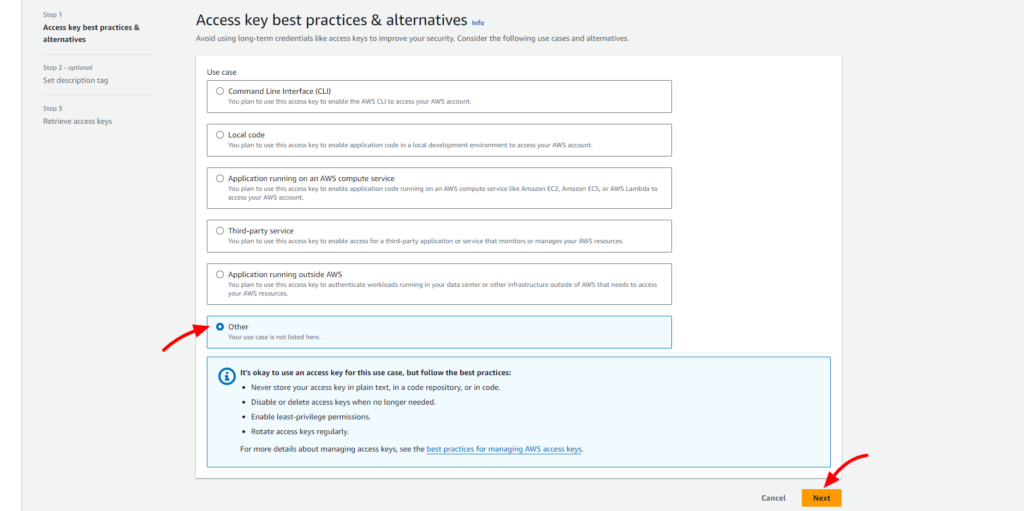
- Choose “Other” from the “Access key best practices & alternatives”.
- Click the “Next” button.
- Enter any Description, such as “QuillSMTP”.
- Click the “Generate access key”.

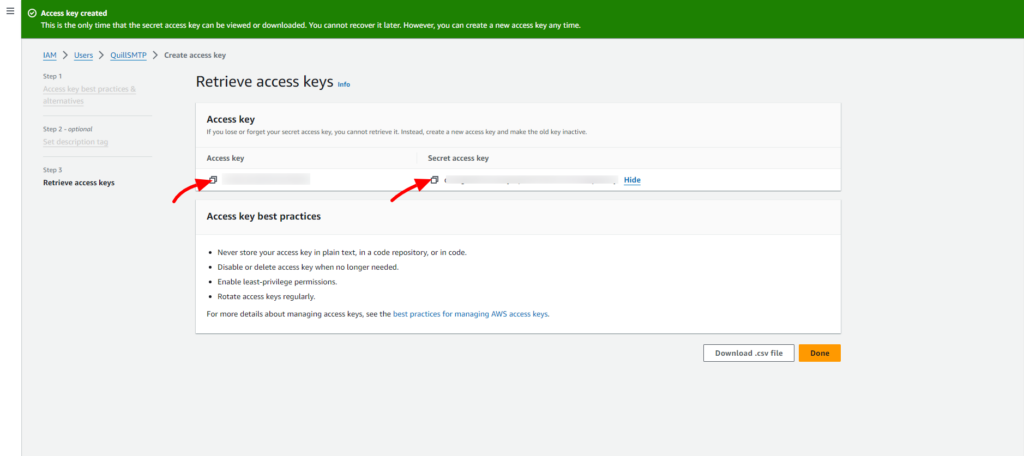
- Copy the generated Access key and Secret Key for later use in configuring QuillSMTP with your WordPress website.
Setting Up QuillSMTP #
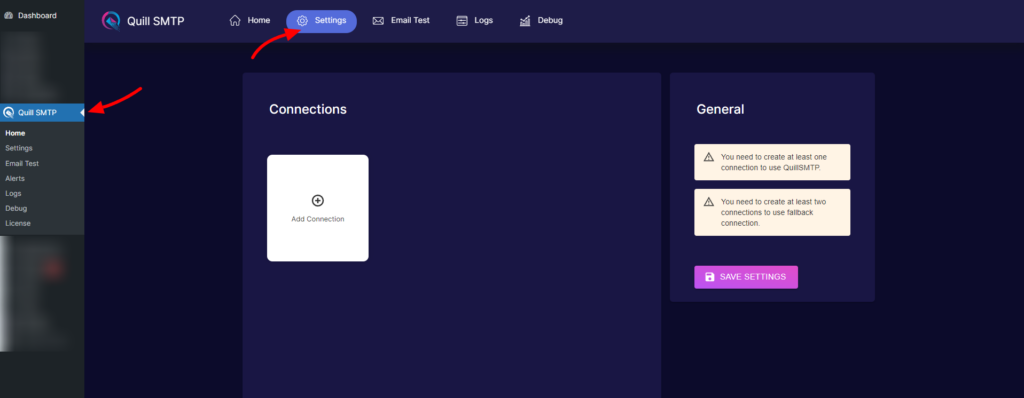
In your WordPress admin dashboard, go to Quill SMTP > Settings Tab.
Setting Up Connection #
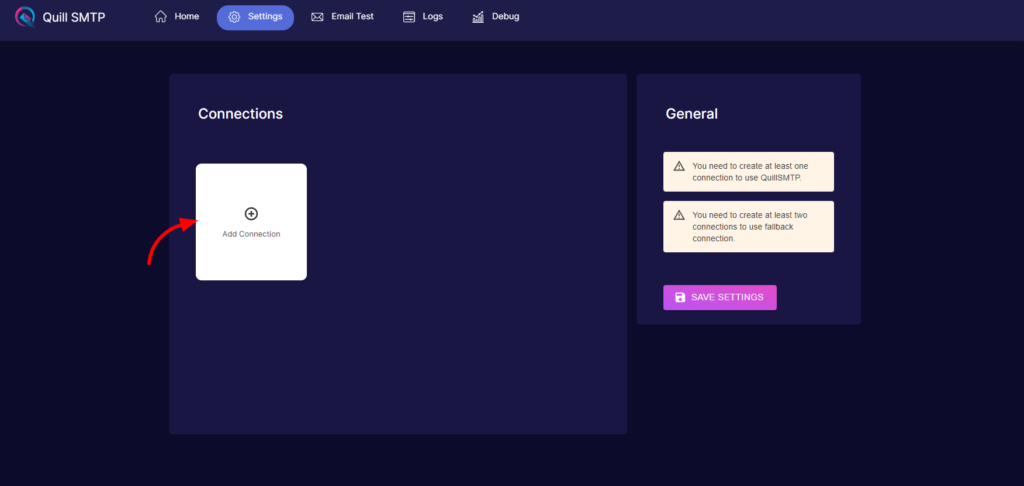
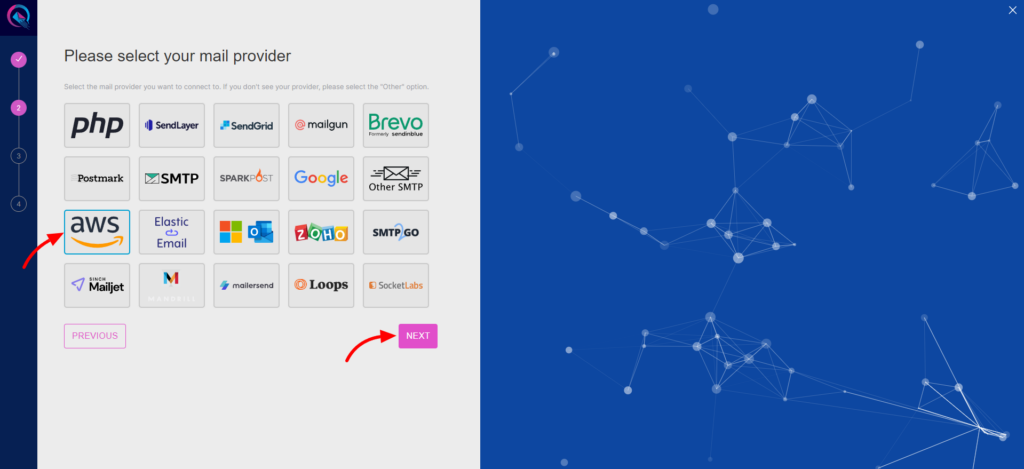
- Initiate the setup process by clicking the “Add Connection”.
- Name your connection accordingly (e.g., “AmazonSES”).

- Choose AmazonSES from the list of available mailers.
- Then click the “Next” button.
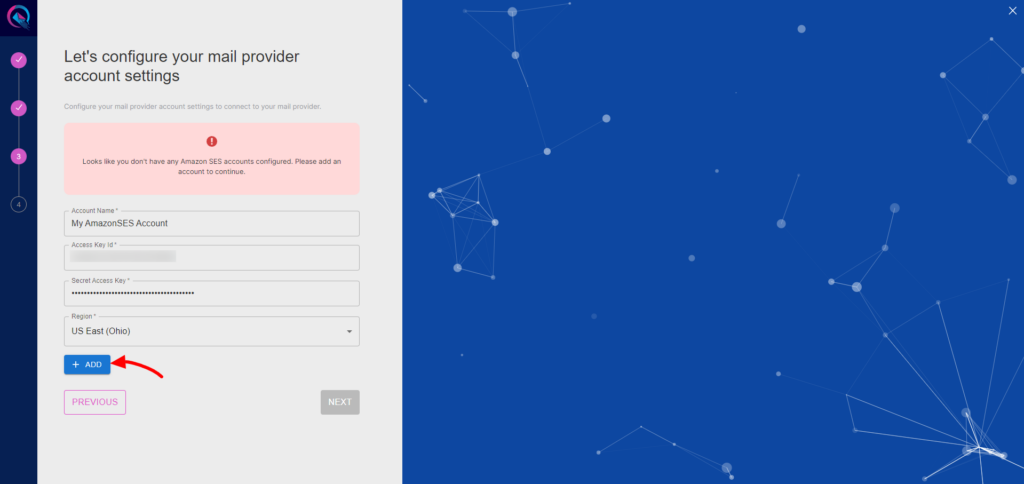
- Provide a descriptive account name (e.g., “My AmazonSES Account”).
- Paste the API Key and Secret Key obtained earlier into the “API Key Id” and “Secret Access Key” field.
- Specify the region.
- Click the “Add” Button.
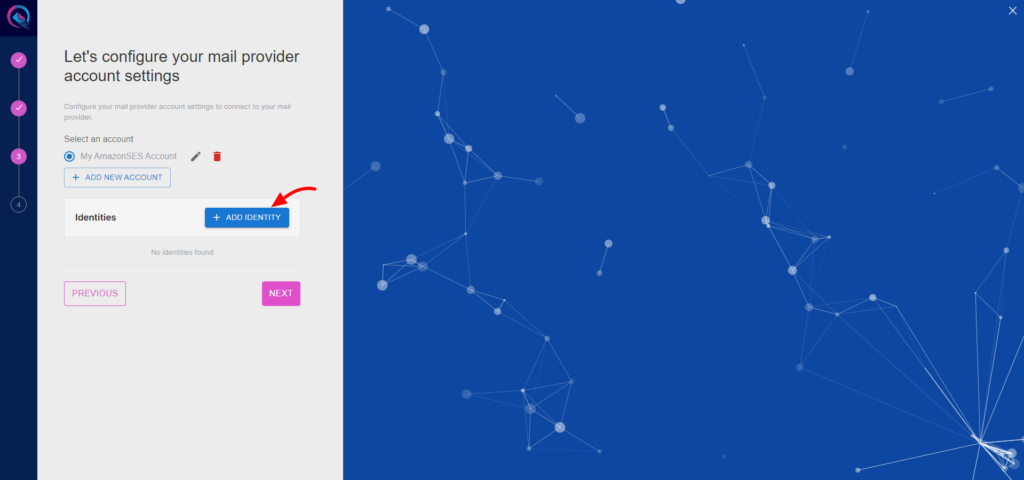
- SES Identities section. This is where you will add any emails or domains that you will use as the From Email on your site.
- Click the “Add Identity” button.
Add a Domain #
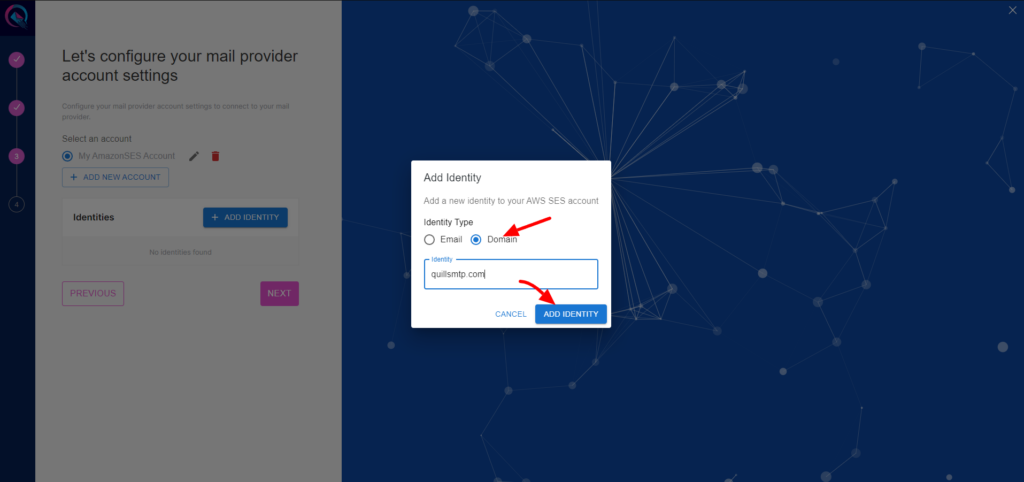
- Choose “Domain” from “Identity Type”.
- Add your domain then Click the “Add Identity” button.
- Once you’ve entered your domain, click the “View” button to see CNAME records for your domain.
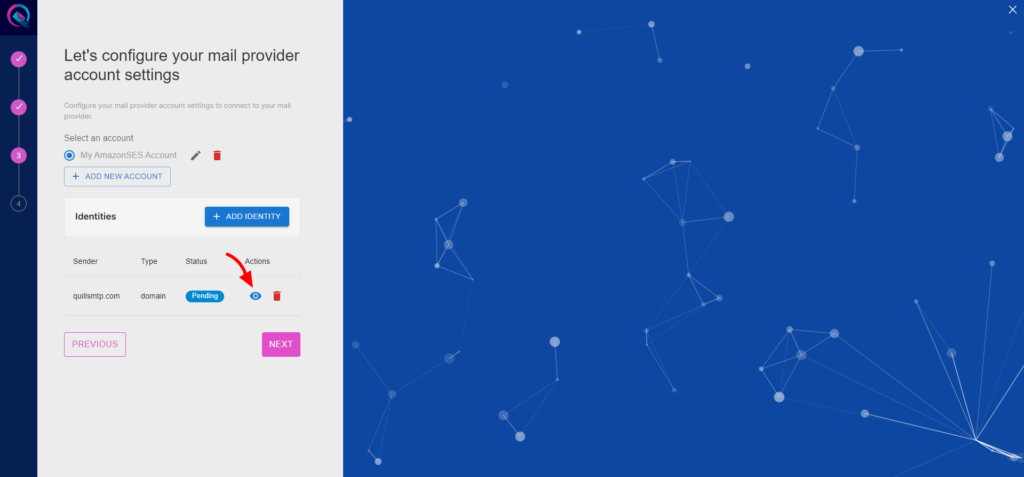

For more information, see Easy DKIM
Add an Email Identity #
- Choose “Domain” from “Identity Type”.
- Add your email then Click the “Add Identity” button.
- you’ll see a notice asking you to check your email’s inbox for a verification email.
- This email will be sent from Amazon Web Services and will include a verification link.

- After you’ve successfully verified your email, you will see the email identity status changed to success.
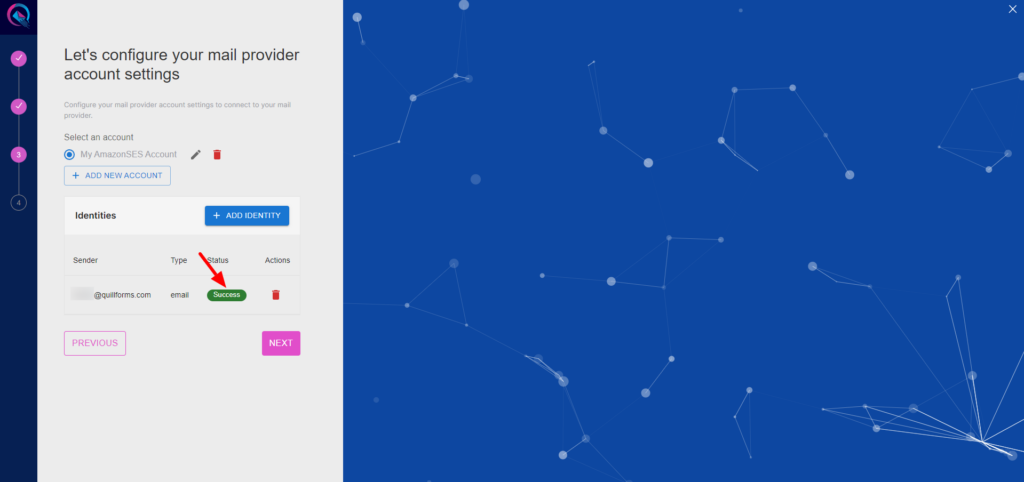
- Click to the “Next” button to complete you connection setup.
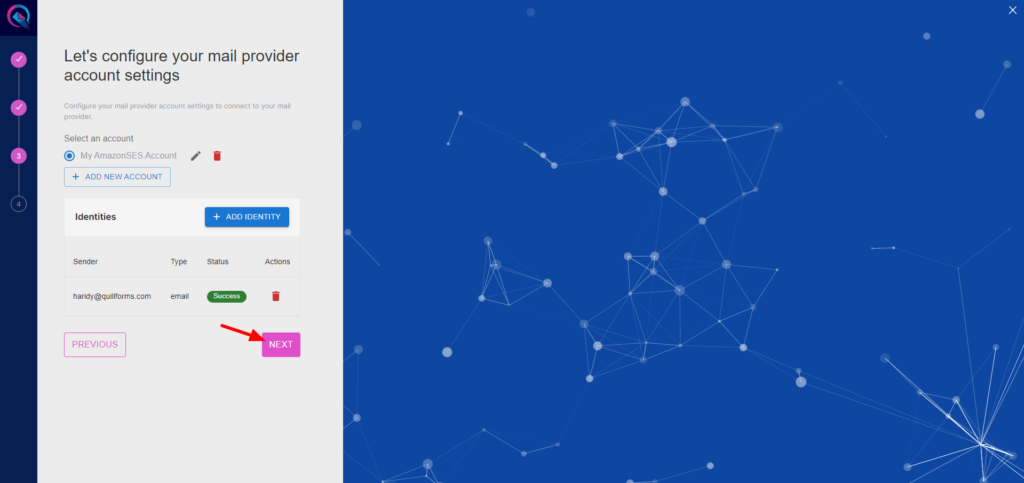
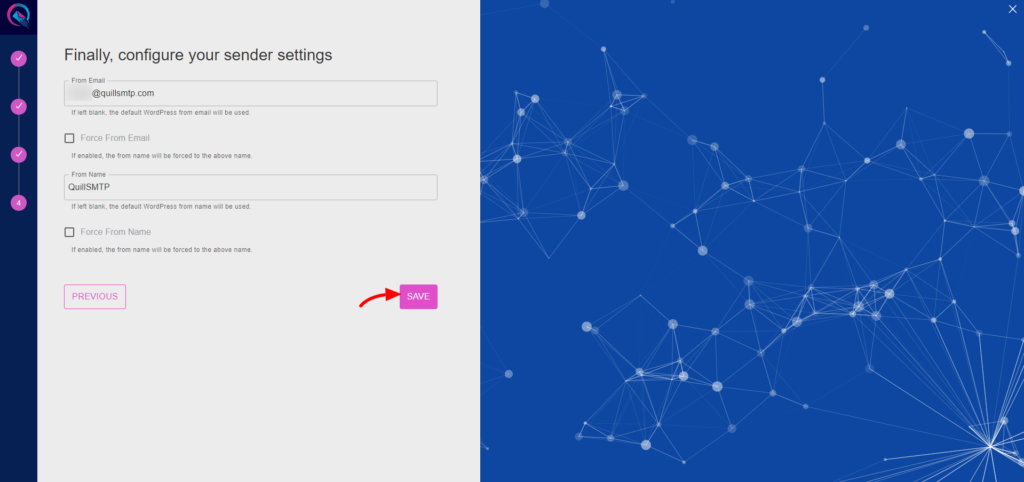
- Input your email address in the designated “From email” field.
- Optionally, toggle the “Force From Email” option if you wish to enforce this email address for all outgoing emails.
- Specify your sender’s name in the provided “From name” field.
- Optionally, toggle the “Force From Name” option to ensure consistent usage of this sender name across all emails.
- Then Click the “Save” button.
